Heat Treat Radio #120: Exploring Sustainable Practices in Heat Treating
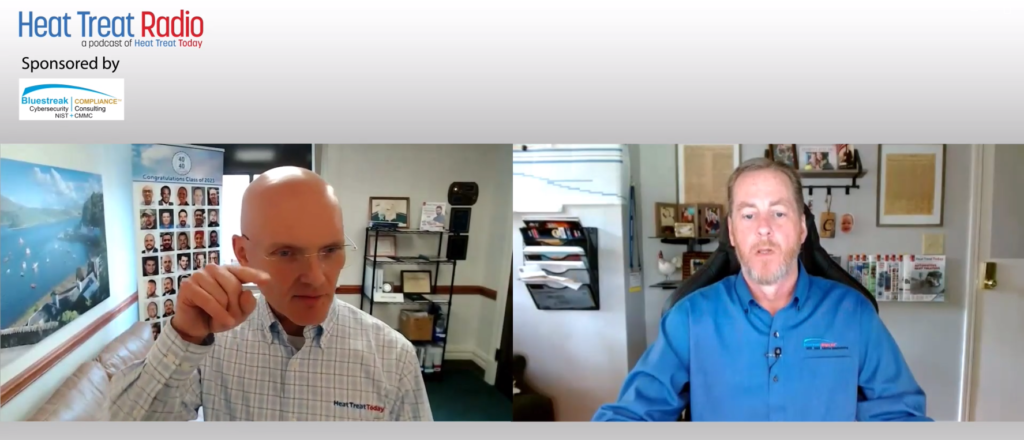
In this Heat Treat Radio episode, Tracy Dougherty, President & CEO of AFC Holcroft, and Ed Wykes, Director of Field Service and Aftermarket Sales, join host Doug Glenn as he discusses sustainability in the heat treat industry. They explore the importance of sustainable practices in the design and operation of thermal processing equipment. Whether you’re upgrading current equipment or innovating new, these changes can improve efficiency and reduce environmental impact. This episode underscores the industry’s commitment to innovation and sustainability.
Below, you can watch the video, listen to the podcast by clicking on the audio play button, or read an edited transcript.
Introduction (01:12)
Doug Glenn: Sustainability continues to be a driving force in the design and operation of thermal process equipment, as well as ancillary services that are provided by equipment manufacturers. There are few companies in the North American marketplace who are more qualified to talk about equipment and especially sustainability than AFC-Holcroft. We have two experts from the industry with us today.
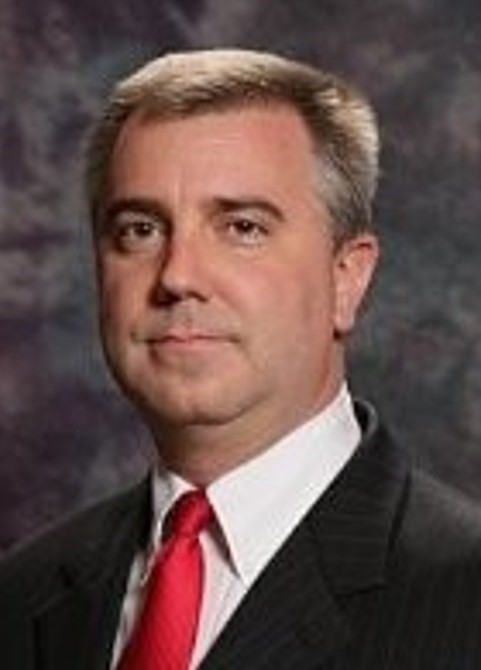
Tracy Dougherty is a 1984 graduate with a degree in tool and die design. He spent his first 15 years in the metal fabricating and stamping industry in various positions, including tool and die designer, application engineer, and manufacturing engineer, before transitioning into a sales role.
Tracy also spent time in material handling, robotics and automation, and the capital equipment industry before starting with AFC-Holcroft in 2008. While at AFC-Holcroft, Tracy’s done various positions, including sales engineer, sales manager, vice president of sales, and currently president and CEO. Congratulations on that.
Ed Wykes is our second guest. Ed is currently the director of field service and aftermarket sales at AFC-Holcroft. He has a bachelor of science in mechanical engineering and business administration, with a minor in business and administration from Kettering University in 1998. Also, he earned an associate’s degree in mechanical engineering/mechanical technology from Wentworth Institute of Technology in 1996.
Ed began his career as a manufacturing engineer at General Motors in 1998 and has been with AFC-Holcroft for a while. He started as a mechanical engineering manager, and now is the director of field service and sales.
Let’s talk about sustainability. I want to break our conversation down into two sections. The first section is going to be on sustainability services, which we don’t often think about. We think about equipment being manufactured in a sustainable way, but there are really a lot of services out there that people can use to help improve efficiency and sustainability. Then we’ll talk about some things happening on the equipment front.
“Green” Services — Sustainability Services (04:40)
Doug Glenn: “Green services.” What is AFC-Holcroft currently seeing in the industry about people requesting services, as far as sustainable services?
Edward Wykes: Our equipment is technical in nature, and it should have longevity in the field — decades. To make that happen, there has to be some service and some sustainability that goes along with that. So, it is technical in nature, and we understand our clients’ needs. Whether it’s a shift or just the development of the market, we understand the client is putting more and more emphasis on sustainability and preventative maintenance.
This comes in many different shapes and forms. As a sidebar, that’s one of the really enjoyable things about working here at AFC-Holcroft — you never know what your next challenge is going to be Every day is a new adventure. But specifically, some of the critical services, as far as sustainability for our equipment in the field, would be National Fire Protection Association (NFPA) inspections that specifically speak to combustion safeties, temperature uniformity surveys (TUS) on equipment, system accuracy tests (SAT), looking at infrared signatures on electrical devices and components. Also, burner tuning is another service that should be regularly considered by our clients.
There are other services that may be a little bit more abstract, but there’s also a lot of value in these services. Engineering optimization is when technical experts from our company go into a client’s facility, whether it’s our piece of equipment or not, and say, “This piece of equipment is 30, 40, 50 years old, and here are some things that we can do that can make this piece of equipment sustainable into the future, but also more green.”
Reducing utility is an important aspect. Many old furnaces might have had water-cooled components, such as water-cooled bearings, or water-cooled fans. There’s always an interest to eliminate the water-cooled utility.
There are other areas. For example, an old AFC mesh belt may not have a large discharge door for maintenance at the discharge side of the furnace — our new ones do. Older pieces of equipment can be adapted with that feature, which can be the difference between being down for a week to being down for a day.
Doug Glenn: Is the large door you mention at the exit side of the furnace for changing the belt?
Edward Wykes: It’s for a number of things: chute maintenance, clearing out parts, when we get into any sort of belt work. There’s just a number of issues that can occur there, and having a large door at the exit side for maintenance access makes it easier — more efficient, quicker, less downtime.
That’s the umbrella that these services and updates fall under: less downtime, increased productivity, and reduced cost. All of these updates contribute to sustainability, as well as trying to be more green, trying to be more efficient. Some of these updates are low-hanging fruit. With a little bit of technical assistance, we can bring this to fruition for our clients.
Gas to Electric Conversions (08:38)
Doug Glenn: You’ve been around for years, just as AFC and then AFC-Holcroft. I’m sure you have hundreds if not thousands of pieces of equipment out there. I don’t necessarily associate AFC-Holcroft with 100% gas-fired equipment because I’m pretty sure you do electric as well. Are you seeing increased requests for gas-to-electric conversions?
Tracy Dougherty: We are. We’re still seeing those options on most of our quotes for equipment these days. North America is still a little bit slower to pull the trigger on this conversion because of the cost associated with it. There’s not really a return on investment (ROI) when you look at electric rates in most of North America, certainly in the United States, relative to gas prices — there’s still a big delta there.
But companies are looking at it differently nowadays. It’s not the same requirement for an ROI within a few years that it used to be because it’s being driven by other things. Companies desire to truly reduce their carbon footprint, which is sometimes a corporate directive, and other times it’s driven by their client base. We’re seeing more and more of it.
Whether it’s on the services side or on the equipment side, this is an area where we have an advantage in being a part of a larger group. By being a part of the AICHELIN Group, we have sister divisions in different parts of the world, including Asia and Europe. We have collaboration meetings with members of the AICHELIN Group. Because Europe is kind of ahead in many ways of where the United States has been, we have the advantage of seeing what they’ve done and what they’ve had success with. Therefore, whether it’s on the services side or the equipment side, it’s really a nice position for us at AFC-Holcroft to be in.
Doug Glenn: You kind of have a leg up. That is AICHELIN Group out of Austria, correct?
Tracy Dougherty: That’s correct.
Doug Glenn: You’re seeing some increased interest in gas-to-electric conversions. We’re going to talk about new equipment in a minute, but let me just ask you, have you seen an increase in the request for electric-only equipment?
Tracy Dougherty: Yes, we have. Most of our quotes these days, they’re asking for that option. We have a couple of furnaces out there now that are in the commissioning stages that are electrically heated, where in the past they would have always been gas heated.
Doug Glenn: Are those North America-based installations?
Tracy Dougherty: Yes.
Impact of Push for Reducing Carbon Footprint (12:13)
Doug Glenn: This is an opinion question, so feel free to tread lightly however you want. Do you think the Trump effect will have any change with the refocus back to ‘drill baby drill?’
Tracy Dougherty: I think it’s certainly going to have an impact in a variety of ways. If we look at the electrically heated, carbon footprint push, I think there were some pretty lofty goals established by certain corporate corporations. Their own CEOs said, “Hey, we’re going to be carbon neutral by 2030,” for example, which is pretty tough if you look at what they’re doing around the globe and what a realistic target is. I think you’ll see the reins pulled back on some of those goals when it comes to carbon neutrality, for example.
I do still think it’s gained enough focused momentum. There are still going to be companies and corporations that are going to drive it forward, which is a good thing, right? It forces us as an industry to constantly improve on what we’re offering today versus just sitting back and thinking, “Hey, everybody’s fine with gas-fired equipment.” It really forces us all within the industry to continue to push ourselves to explore what the next best thing is for efficiency and sustainability.
Doug Glenn: I think the rate at which governments were wanting to convert gas to electric was pretty aggressive. Reactive reality is a harsh teacher. You need to do things at a pace people are willing and able to do it and that is economically viable.
Hydrogen Combustion (14:32)
Doug Glenn: Is AFC-Holcroft doing anything on the service side with hydrogen combustion or are you prepping for it? Have you had people asking about it?
Edward Wykes: The short answer is no, we have not had any hydrogen conversations with any of our clients.
Doug Glenn: That is not unusual. I had interviewed 2 or 3 experts recently for a speech I had to put together about hydrogen. These were burner experts, and both said, “Yeah, we’re still getting information, but it has cooled off significantly.” Again, I think this is another situation where the economic reality is kind of driving the real pace, as opposed to non-market factors.
Tracy Dougherty: That’s another advantage of being a part of the AICHLEN Group. Other group companies have experimented and looked at some of these technologies, among others. We have regular monthly meetings to go through what each of the group companies is doing from an R&D perspective. We can continue to be close enough to it to understand what some of the challenges are.
Doug Glenn: Is that NOXMAT? That’s your burner company, but they’re also out of Europe.
Tracy Dougherty: They are out of Europe, that’s correct.
Doug Glenn: Like you said, you’re able to learn from these explorations and have an advantage because you can see it from a variety of perspectives, which is good.
I want to wrap up the sustainability services portion of this. Is there anything else that AFC-Holcroft is doing right now that is worth noting on sustainability?
Edward Wykes: To recap some of the things we just touched on here, we do have a good partnership. We are globally supported. It’s a technical company, and whether it’s engineering or field service or even our fab, we’re constantly looking for ways to bring our equipment into the next generation — whether it’s updating technologies on our equipment, changing from older technologies like cam switches to encoders, looking at the latest temperature controllers, or taking clients’ older, obsolete control systems and upgrading them.
Honestly, it’s a never-ending challenge to just say, “Okay, what is the next thing that we can bring to our client,” whether it’s new equipment or a retrofit to an older piece of equipment that can save them some money, make their equipment more safe, or bring them in line with some of the regulatory committees that we see here on our end. Insurance and plant safety can be driving forces for these as well. We’re fortunate here to have such a technically diverse group; there’s a lot of support and it’s a complete package that we typically can offer our clients.
Artificial Intelligence (18:10)
Doug Glenn: So your answer made me think of one other question here, and that is artificial intelligence. AFC-Holcroft is on the cutting edge of technology. Are you using AI on the corporate level or having discussions about it?

Tracy Dougherty: We’ve had discussions about it. Some of the discussions so far have been around where we want to use it, where we shouldn’t be using it, which platforms we should be using, and parameters to consider when using AI.
We had a management meeting last fall up in northern Michigan, Harbor Springs, for the whole group, and we had an AI expert in for us who has worked with the US military for decades. It was a very interesting conversation. So, the short answer is yes. As a group, as a company, we’re looking at it, we’re using it in very minimal cases so far. It’s exciting and it’s scary at the same time.
Doug Glenn: It really is. That’s a great way to summarize it. It’s like, “Wow, that’s fascinating and great.” And then you think, “Oh boy, what could it be used for?”
Equipment Sustainability (19:47)
Doug Glenn: Let’s talk about equipment for a bit, because I know the breadth of equipment and the types of equipment that you manufacture up to this point is very broad. Your equipment is primary air and atmosphere equipment, no real induction equipment that I know of, right?
Tracy Dougherty: We had an induction company that was part of the group, EMA out of Europe, and we sold that division of the group. I think it was about a year ago or so. So we no longer have induction in the group.
Doug Glenn: Most of your equipment is air and atmosphere equipment, continuous and batch, semi continuous. From a sustainability point of view, how are you handling upgrades to equipment, and what are you working on?
Tracy Dougherty: Our modular products are one of our core products. They make up about half of our sales. We’re currently going through a review and upgrade to our modular products, such as the UBQs, the universal batch quench furnaces, the UBQAs, which is the same with the salt quench system, the easy generators, and all of the ancillary equipment associated with that.
Our engineering team currently is undergoing an upgrade to those furnaces to make sure that we’re going through all of the design, because it’s a solid design. It’s been out there for a long time. We do quite well with it. It’s a very high performing piece of equipment. But we also know that we’re always looking at ways to make them more efficient, more robust, to make them better. We have a team that we’ve assembled to look at those designs and say, “Okay, where can we continually improve those products?”
We’re doing the same thing with some of our continuous furnaces. Our mesh belt furnaces, for example, are currently undergoing an upgrade for sustainability. How can we save the atmosphere? How can we make them more energy efficient? How can we eliminate downtime through part mixing and some of these other strategies? So that’s also in our engineering team right now where we’re undergoing upgrades to the standard design for those components.
Getting back to the group, we also have things that we’re doing here at AFC-Holcroft, as well as some of the group companies. As an example, we are looking into industrial waste heat recovery systems. We’re looking at ways to capture the waste heat from high heat furnaces and use that heat for a variety of things, whether it’s in northern climates in winter months, heating a facility, heating the wash water on a washer, a variety of things.
While we’re doing that here at AFC-Holcroft, the group company is also looking at prototypes and other things for the industrial waste heat recovery systems. So, that’s another area where we’re always looking at ways to improve the equipment and the energy efficiency of the equipment.
Atmosphere Consumption (25:45)
Doug Glenn: Is AFC-Holcroft doing anything with your equipment regarding atmosphere consumption?
Tracy Dougherty: Yes, absolutely. Part of the design upgrades that we’re looking at is the amount of atmosphere that we’re consuming, both on the continuous furnaces, as well as the batch furnaces. We have a high/ low Endo flow on our furnaces, the programmable recipe to go to high flow when you’re transferring a load but then go to a reduced flow. Then the generator supplies the demand based on the furnace’s demands. For the continuous furnaces, we are looking at the type of loading systems we’re putting on pusher furnaces or what we call an eco-box on a belt furnace, which is almost like a nitrogen curtain on the front. With belt furnaces, you have a throat on the front and the back and an opening of a large atmosphere box basically.
We are looking at ways that we can reduce atmosphere consumption in the furnace by 20% to 30% in some cases.
Doug Glenn: What is the eco-box that you refer to?
Tracy Dougherty: It’s a small unit that sits on the charge end of a belt furnace that provides a “nitrogen curtain” on the lower end of the belt. It basically prevents the loss of atmosphere from the furnace itself. That along with unique throat designs that we’ve also tested and looked at are the updates that we are exploring. With any furnace, you’re running that thing 24/7, 365 days a year. Small gains can make a big difference
Calibration Mode (28:08)
Doug Glenn: We’ve discussed in the past or I’ve read on your website perhaps something called calibration mode. What is that?
Tracy Dougherty: It’s a recipe. It’s a separate screen within our batch master system on our batch furnaces. When you put in a new furnace, you have all your presets on that furnace. So when we come in and we set it up and you start running, everything is set to operate to proper operating parameters — everything from the amount of time it takes the door to open and close, to the elevator up and down, to the atmosphere, to the heat up rates, and all of those parameters.
Calibration mode, which we recently got a patent on, is a test cycle for heat treaters. If we start to see some variation in the hardness levels of the parts or there are other challenges, we can run calibration mode through the furnace. Basically, you put a load in the furnace, a dummy load or a scrap load, or you can run it without a load for that matter, but it’s best with a simulated load. You run it through that recipe, and it’ll give you red/green acceptable levels on every preset parameter for that furnace and be able to tell you whether your door has drifted, for example. So maybe you need to rebuild the seals on the cylinders, or it allows a heat treater to pinpoint reasons or areas where things have drifted from when that was a new furnace and a new install.
Doug Glenn: It’s for batch furnaces, right?
Tracy Dougherty: Correct. Right now, we use it on our batch equipment. It’s really a great selling tool for commercial heat treaters as well because if they have clients coming to them they are able to show on their batch equipment that they can identify if there’s any portion of this furnace that drifts away from when the parts were approved through the production part approval process (PPAP). They can see that through this calibration mode recipe.
Carbon Emissions (30:56)

Doug Glenn: Has AFC-Holcroft ever been required or voluntarily done anything to measure emissions, carbon emissions most notably?
Tracy Dougherty: We have within our group. One of our R&D projects within the AICHLEN Group is currently in the development of a carbon emission measuring system on a furnace line. It’s fairly well along at this point, but it’s a prototype that the group is working on. It’s something that is being driven much more in other parts of the world versus the U.S. currently. But I think these are the types of technologies that are coming down the pike so that we will be able to actually monitor and measure emissions on a furnace line.
Electrically Heated LPC Furnace (31:56)
Doug Glenn: Tracy or Ed, anything else on the equipment side that you want to mention as far as sustainability efforts?
Tracy Dougherty: We do have an electrically heated low pressure carburizing (LPC) furnace that we’ve installed and commissioned recently as well. We just went through final acceptance on it. It has a 36 x 72 x 48 effective load size, and it has a 10,000-lb gross load capacity. In this case, it’s the LPC furnace that has a vacuum cooling chamber on it. It doesn’t have a quench currently, but that’s what we’re looking at offering to the industry as well. We have developed the LPC furnace successfully, and so now we have this furnace that we are going to be able to offer to the market that is interested in LPC.
When it comes to certain parts, certain specifications that require no IGO (intergranular oxidation), we’ll be able to connect oil plants or salt plant systems to an LPC furnace, install it in an existing line, possibly an atmosphere UBQ line, and have it be fed by the same transfer car, but now also have the ability to do LPC with either oil or salt plants.
Business Sustainability: Partnerships & Joint Ventures (33:40)
Doug Glenn: I know we’re talking about sustainability, but we need to have business sustainability as well. AFC-Holcroft has had some interesting partnerships around the globe that I wanted to ask you about. The one that was most interesting to me was your AICHELIN ST Vacuum move that you’ve made recently and you mentioned. What is that?
Tracy Dougherty: It’s a joint venture with System Technique, which is a Turkish-based company. This joint venture is to offer single dual chamber vacuum furnaces currently to the European market. They just installed a single chamber vacuum furnace in a body coat plant in Finland.
The AICHELIN Group sees vacuum as something that we’d like to expand into, with what we’re doing over here with the LPC that I just mentioned along with this joint venture in Europe. We have a knowledge base in it. You may recall, AFC-Holcroft had about a 10-year joint venture with ALD out of Germany. So, we do have some of that tribal knowledge. It’s not completely new to us. We think we’ve got something to offer the industry with some unique features.
Doug Glenn: Are you going to be offering that equipment in North America?
Tracy Dougherty: Yes, we’re currently looking at strategies. Before we introduce it to the market, we want to make sure that we have a good strategy for not only where we’re going to build them, but how we’re going to service and support them from not only a service perspective, but spare parts, critical spare parts, and things like that. We’re going through that process now, but that is our eventual plan.
Doug Glenn: For your service and aftermarket work, are you all in North America? Where do you roam?
Edward Wykes: We service all of North America, and we also support our equipment in Europe when it makes more sense for us to do it than the AICHELIN service group.
Doug Glenn: Do you send a team over?

Edward Wykes: We send employees over and/or do remote service, and we also work with AICHILEN Group to help some of our current clients. There’s a desire on their end to want to learn and understand and be able to service our equipment locally. We work with them on that as well.
Doug Glenn: Is your service team able to do a lot of remote work?
Edward Wykes: It’s more and more prevalent as technology advances that there’s a need for remote support, especially with a lot of the controls, upgrades, and these types of technology. This technology lends itself to being done remotely if there is a competent service team on-site at the client’s facility.
Doug Glenn: Are most of your service team members employees or do you use subcontractors to do service.
Edward Wykes: For the most part, our service team members are AFC employees.
Doug Glenn: How many people do you have out in the field?
Edward Wykes: We usually have anywhere from 5 to 7 people in the field.
Doug Glenn: That’s a good crew. I understand that AFC-Holcroft is making some investments in the EV, electric vehicle, marketplace with a company in Japan and one in China. Can you tell us about that?
Tracy Dougherty: The AICHELIN Group has a partnership with KILNPARTNER, which is a Chinese company, mostly for the European market. But if they were to run into a system that they need our assistance with, we have the ability to assist them as needed. That’s a partnership that’s been a few years in the making now.
We recently signed a three-phase agreement with TOKAI KONETSU out of Japan. Phase one for us with TOKAI is to basically be the North American support team, assisting them in sales efforts, but then to also be here for the service support, commissioning, and installation of their systems. They’re running off a pusher type kiln for the battery powder market, the anode cathode battery powder market over in Japan. We’re sending a team over to go through some training with them to better understand their systems. For us, phase one is the ability to assist them in the North American market because it’s difficult for anybody to penetrate a market if you don’t have local service and support.
Doug Glenn: The last one I wanted to ask you about was this one in Japan, Sanken Sangyo, with multi-level rotary furnaces for solution, aging, and tempering.
Tracy Dougherty: Yes, we have had that one in place for a couple of years now. The market is a little soft for that. It’s specific to rotary multi-level rotary solution and age systems, as you said, d5 t6 aging systems. They’re used in the manufacturing of aluminum wheels, blocks, and heads. With the heavy EV push, of course, there’s a good amount of capacity built up for those things. But the opportunities there right now are a little bit soft.
We’re also looking at that particular furnace design for other ferrous applications, tempering applications in ferrous, because they take up a much smaller footprint. Sometimes, you have these very long belts or chain conveyor tempering type systems that can take up a lot of floor space. Tempering ferrous applications are a very efficient alternative. We have one that we’re looking at now, which is a tempering ferrous application, that we think will fit that very nicely.
That’s another partnership that is set up very similarly because they, being a Japanese company, have a difficult time over here without having somebody local. It’s a little different in that it’s not a phased approach. We’re going to build the systems over here, right out of the chute. We’ll build them over here, we’ll install them, we’ll service them, and then they will support us from an engineering and reference perspective.
Conclusion (41:47)
Doug Glenn: We’ve talked a little bit about sustainability services and sustainability equipment. Then I wanted to take a quick note on some of these partnerships that you had. It’s interesting when you’re working with international companies, like you said, a parent company in Austria, you have partnerships in China, Japan, all over the globe. You get the perspective, especially on the sustainability side. It is being done a lot more in Europe especially, so you have a unique position.
Thank you for your time today and for sharing your expertise.
Tracy Dougherty: One more thing I wanted to mention on the on the partnership side of things. I would be remiss if I didn’t mention our partnership with Mattsa down in Mexico. It’s kind of the other end of the spectrum. With Mattsa, we’re almost extensions of each other. We’re actually going down there this this fall in October to celebrate our 35-year anniversary of working together with the Mattsa team.
About the Guests
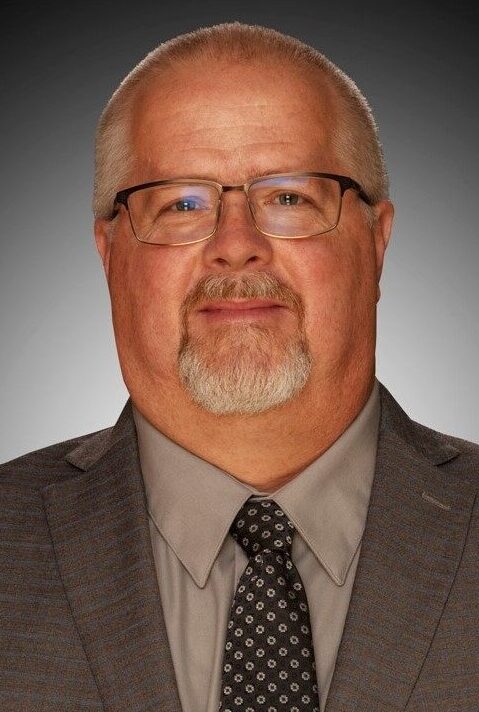
President & CEO
AFC Holcroft
Tracy Dougherty received a degree in Tool & Die Design in 1984 and worked for 15 years in the metal fabrication/stamping industry in various positions. He has experience as a tool & die designer, applications engineer, and manufacturing engineer before transitioning into a sales role. He worked in materials handling, robotics, and automation capital equipment before starting with AFC Holcroft in 2008. He is currently the president/CEO of AFC Holcroft.

Director of Field Service and Aftermarket Sales
AFC Holcroft
Ed Wykes completed a Bachelor of Science in Mechanical Engineering and Business Administration with a minor in Business Administration from Kettering University in 1998. He began his career as a Manufacturing Engineer at General Motors in 1998. In the years following he held positions as an Automotive Market Manager, Account Manager, Sr. Marketing/Sales Engineer, and Program Manager. He started at AFC-Holcroft as a Mechanical Engineering Manager before becoming Director of Field Services.
Find heat treating products and services when you search on Heat Treat Buyers Guide.Com
Heat Treat Radio #120: Exploring Sustainable Practices in Heat Treating Read More »


