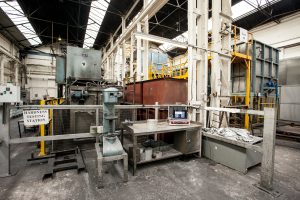
The largest subcontract heat treater of aluminum alloys in the UK, accredited to process components to Prime specifications, turned to a manufacturer of Brinell hardness testing machines to develop a more efficient testing process.

Alloy Heat Treatment (AHT), which serves the aerospace, automotive, energy, and other sectors, has a large number of prime customer approvals including Leonardo Helicopters, Airbus, Safran, Boeing, and BAE Systems. They are accredited to heat treat to these Prime’s specifications and often work as a trusted supplier to other companies that deal directly with them. Part of the Prime specifications dictates that Brinell hardness testing is carried out prior to releasing the components. AHT settled on the Foundrax BRINtronic automatic Brinell microscope, designed by Foundrax Engineering Products, based in Wessex, England.
“Part of the release process for aluminum alloys is that we must do conductivity and hardness testing on every job that leaves us,” said Steve Roberts, Quality Director with Alloy Heat Treatment. “As such we were looking at ways that we could gain efficiencies in this process. Using the BRINtronic from Foundrax has allowed us to gain these efficiencies.”
Brinell hardness measurements were required to be taken in areas of components where access is limited by intricate machine webbing or where the nose diameter of the microscope is restricted to approximately 30mm.

“One of the problems we needed to solve with equipment selection is that the microscope must get into quite intricate places,” continued Roberts. “All the other microscopes we looked at have wide noses on them so, the design of the Foundrax scope was right up our street. We’ve used the manual Foundrax microscopes for as long as I’ve been here.”
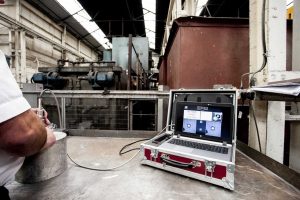
“As the microscope automatically measures the indentation at multiple points, results are instant,” said Alex Austin, Managing Director of Foundrax. “They are recorded, and of course, the operator doesn’t have to turn the microscope 90 degrees and remeasure as he would with manual measurement. There is well over a 50% saving on measuring time.”

“Obviously, the usability of the BRINtronic suited us,” said Roberts, “because we could get it into the places that we would struggle with using the competitor’s equipment. The process of measuring was far easier with the Foundrax BRINtronic as with the others we had to try and hold it with both hands and press buttons. They weren’t particularly well balanced either so in practice we were losing efficiencies rather than gaining them.”
Main photo caption: Steve Roberts of AHT uses the BRINtronic testing machine from Foundrax.


